I'll let the girls share their explanations of how the soap was made and/or why they liked this project (this is what they wrote for the exhibit hall display to go along with their soap bars).
Titus Soap By: L. Almeida
I raised a pig last year and I wanted to make soap out of his pig fat and call it, “Titus Soap” after him. My dad helped me render the fat we needed to make a lye soap recipe we found on www.everyday-wisdom.com. It took a really, really long time to make this soap. There were all kinds of steps and working with the lye is dangerous so my dad had to do that part. I had to be really patient making this kind of soap because it has to “cure” for a month after we added the lye to the fat. Then we had to grate the bars of cured soap and melt them again to add scents. You can’t add scents to the soap when you add the lye because the lye will kill the scents. You have to let the bars cure for a while before you re-melt them and add the scent. Then the scents will be stronger and smell nice.
My favorite part was measuring out all the ingredients to make the lye bars. The scents part gave me a headache because they were so strong. My fingers smelled for days. The scents I liked best were the coffee & cinnamon bars and the lavender bars.
Making Pig Fat Lye Soap By: G. Almeida
Making this kind of soap using pig fat from my sister’s pig was hard but it was fun. It took a long time to make this soap - a couple of months! We ended up making very good soap with all kinds of scents though and choosing scents for the soap was the most fun. The soap I liked best was the cinnamon & oatmeal bar.
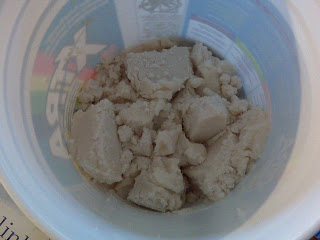
Rendered pig fat
Measuring out the lye using a scale.
Precision is key with the recipe.
Mixing the lye in to the fat, which was done outside with much safety gear. Pure lye, an alkaline base, is a very dangerous chemical if not handled with safety in mind. When lye is mixed with water it releases a lot of heat and can easily burn exposed skin and damage eyes. It also releases fumes when mixed with water that can harm the lungs so mixing should be done in a well-ventilated area. Lye is (for obvious reasons) not widely available and Fino had to order some through a local hardware store for this project.
L. enjoyed the mixing stage once the lye and fat completed their initial chemical reaction. With stirring, the mixture smoothed out in to a pudding like substance.
Once the lye bars were 'cured' the kids then grated them and re-melted the pieces so they could add scents.
G. really enjoyed adding various scents. L. did more experimenting with this step, hence her headache because she had to take big (and multiple) whiffs of every scent bottle.
Once the scents were added (and the oatmeal and coffee grounds to exfoliate for some), the bars needed to cure for another few weeks on a screen.
Lye Soap Recipe
Based on recipe from: www.everyday-wisdom.com
Basic items needed:
4-6 quart Pyrex or oven ware bowl with handle and a spout.
4-6 quart glass, stoneware crock, stainless steel or iron cooking pot.
A long handled heavy duty wooden or stainless steel spoon for stirring the mixture.
Rubber gloves
Eye Safety glasses
Small shallow cardboard or wooden box lined with a plastic trash bag.
Ingredients:
One 12 oz. can of 100% lye
21.5 oz. ice cold or partially frozen distilled water
5 lb. lard or all vegetable shortening (rendered pig fat)
Directions:
Place the water and or ice cubes into the bowl, carefully add the lye to the water. Do not reverse this process. Using your stirring spoon stir carefully till the lye has dissolved. Cover and let set until it drops in temperature to around 85 degrees.
Melt your lard and put into the 4-6 quart container; let cool to 95 degrees. Now you can start to make your soap.
With your stirring spoon, start to stir in a figure-8 pattern. Slowly pour the lye water into the melted lard. Pour very carefully and slowly, making the flow of the lye water smaller than a pencil...just trickle it in until its all been added. Once you start this process you must keep stirring until the mix is thick like a cooked pudding. If you stop stirring it may separate.
When the mix has thickened up you can then pour it into your lined box. Allow to set for 4-6 hours. Using a table knife you can cut into bars. Do not use a sharp knife that will cut into the plastic liner. Allow a week for drying time before you remove the soap from the box. After the soap is removed from the box, allow the soap to cure for 30 days.
To add scents, grate the cured soap bars and melt them down again. Once melted mix in scents and pour in to molds. Once soap is firm in molds, pop the bars out and let dry on a screen for another 30 days or until soap is firm and dry.


No comments:
Post a Comment